
Power on HP ProLiant servers with iLO, SSH & Plink
Some weeks ago, Frank Denneman wrote a short blog post about accessing his Supermicro IPMI with SSH. He used this access to power on his lab servers.I don’t use Supermicro boards in my lab, but I have four HP ProLiants with iLO and iLO has a also a SSH interface. This way to power on my servers seemed very practical, especially because the iLO web interface isn’t the fastest. But I wanted it a bit more automated, so I decided to use Plink to send commands via SSH.
Create a new user account
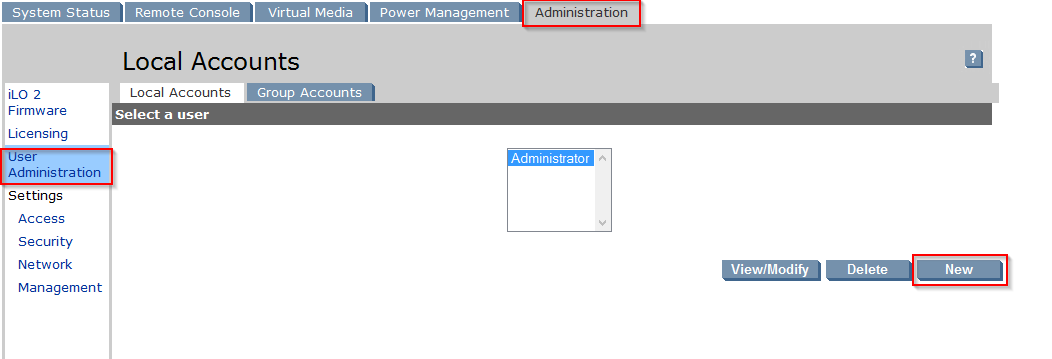
I created a new user account in the iLO user database. This user has only the rights to change the power state of the server. Login into the iLO web interface. Click on “Administration”, then “User Administration” and “New”.
Patrick Terlisten/ vcloudnine.de/ Creative Commons CC0
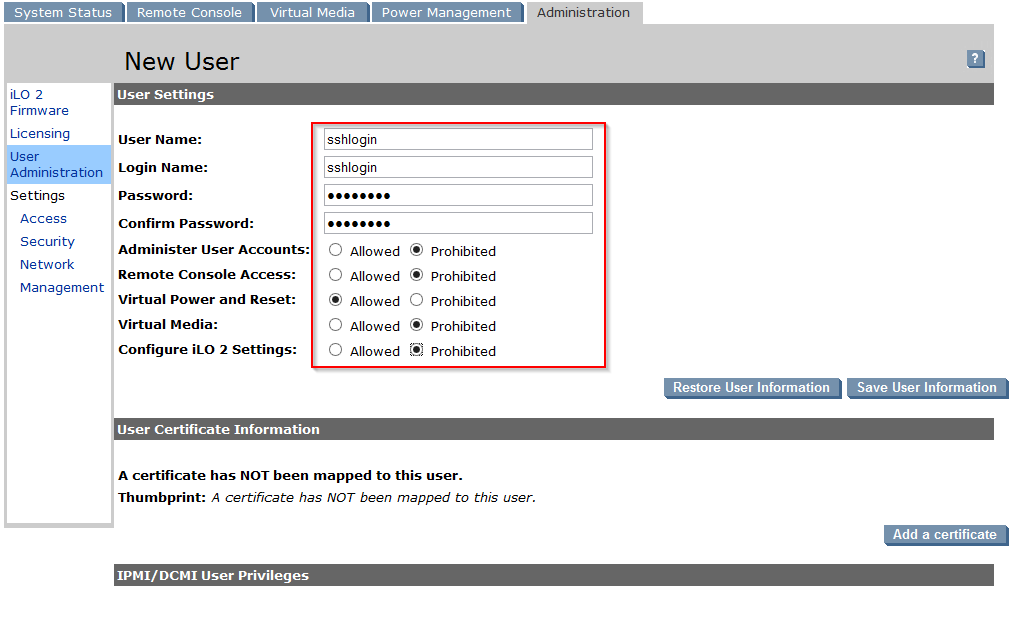
Fill in the required fields. You have to enter a password, even if you later login with SSH public key authorization. Only allow “Virtual Power and Reset”. All other rights should be disallowed. Click “Save User Information”.
Patrick Terlisten/ vcloudnine.de/ Creative Commons CC0
Create SSH key pair
I used the PuTTY Key Generator to create the necessary SSH key pair. Click “Generate” and move the mouse in the blank field.

Patrick Terlisten/ vcloudnine.de/ Creative Commons CC0
Enter the username of the new created user in the “Key comment” field. Copy the public key into a textfile. You need this file for the key import into iLO. Then save the public and private key.

Patrick Terlisten/ vcloudnine.de/ Creative Commons CC0
Key import
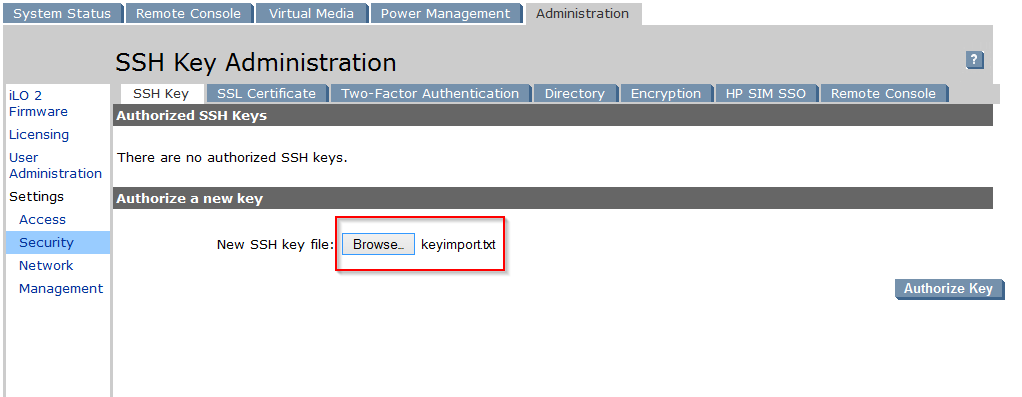
To import the key, login into the iLO web interface again. Click “Administration”, then “Security” in the “Settings” area on the left. Click “Browse…” and select the text file with the SSH public key. The key that is shown in the “Key” area of the PuTTY Key Generator differs from the saved public key. Both are public keys, but they have a different format. You have to import the key, that is shown in the “Key” area.
Patrick Terlisten/ vcloudnine.de/ Creative Commons CC0
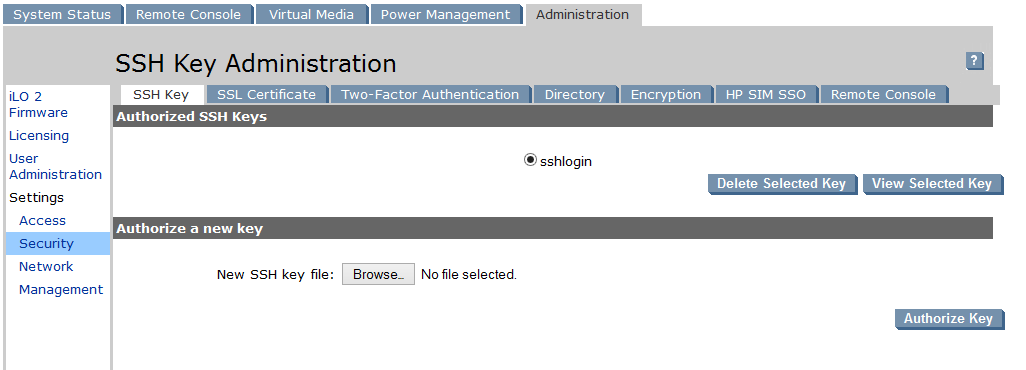
If you have imported the right key, the key is automatically assigned to the new user.
Patrick Terlisten/ vcloudnine.de/ Creative Commons CC0
The test
Open a CMD and change to the directory with the Plink executable and the SSH private key. The following command turns the server on.
C:\Program Files (x86)\PuTTY>plink -i sshlogin.ppk sshlogin@ilo-esx1.lab.local "power on"
To turn off, simply use this command:
C:\Program Files (x86)\PuTTY>plink -i sshlogin.ppk sshlogin@ilo-esx1.lab.local "power off"
A warm reset can be requested by using this command:
C:\Program Files (x86)\PuTTY>plink -i sshlogin.ppk sshlogin@ilo-esx1.lab.local "power warm"
A cold reset can be requested by using this command:
C:\Program Files (x86)\PuTTY>plink -i sshlogin.ppk sshlogin@ilo-esx1.lab.local "power reset"
You can put these commands into a batchfile to power on/ off a couple of servers with a single click.