
Moving a small on-prem environment to Azure/ O365 – Part 2
A couple of days ago, I wrote about our first steps to move our on-prem stuff to Azure. This post will cover how we adopted Office 365 and how we have started with our Azure deployment.
Our first step into Office 365 was Microsoft Teams. We needed a solution for calls (audio/ video) and chat. We skipped Skype 4 Business and started with Microsoft Teams.
Our Microsoft Teams deployment was pretty simple: We used our Microsoft IUR Office 365 E3 plans. Microsoft Azure AD Connect was quickly deployed and the Microsoft Exchange Hybrid Connection Wizard did the rest. Some weeks later we deployed ADFS/ ADFS Proxy. We used this setup over several months and it was pretty slick and was working flawless. At this point, we only used Teams, Planner and OneDrive 4 Business (SharePoint).
Some months went by until we decided to move to Azure.
Resource groups in Azure
You can imagine a resource group (RG) as a container that contains one or more resources, like VMs, NICs, SQL instances etc. The resource group can contain all the resources for the solution, or only those resources that you want to manage as a group.
First question: What do we need to deploy?
The answer was easy:
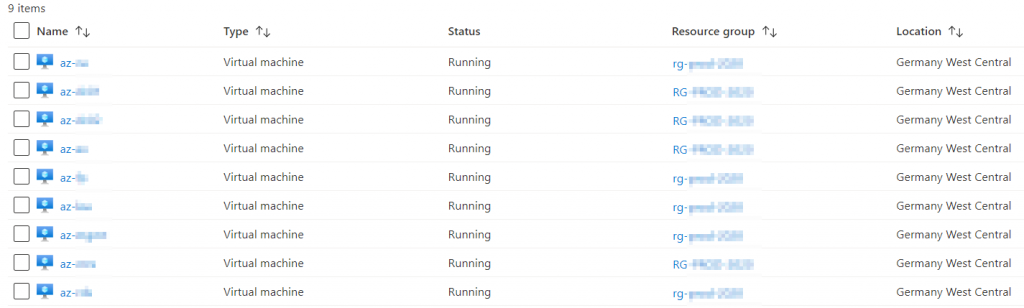
- in sum 9 VMs
- VPN gateway
- Recovery Services Vault
- Automation Account
- Log Analytics Workspace
Second question: One or multiple resource groups?
An easy rule of thumb is, that a resource group should contain only resources that share the same life cycle and sponsor.
Third question: Who needs delegated priviledges to manage this stuff?
In our case there was no need to fine-graded RBAC. All of our technical staff has a personalized admin account and should be able to do whatever is necessary.
So we went for a single resource group.
Do yourself a favor and keep the recommended naming conventions in mind!
Site-2-Site VPN
To connect our on-prem network to Azure, we had to setup a Site-2-Site VPN. This was the first thing after creating our first resource group. We used a Gen 1 Basic VPN Gateway, which was sufficient for our needs (max 100 Mbit, no OpenVPN, no BGP).
Keep in mind to choose your networks and subnets wisely. If you need to deploy 9 VMs, don’t use 10.0.0.0/8. ;) In our case we added two network ranges with a single subnet in each network range. One for our server VMs, and a second subnet as gateway subnet.
VM Deployment
We deployed our VMs as B-Series VMs. A common mistake is to use the wrong VM size. Start small and right-size a VM if necessary. Most of our VMs are B2s (2 CPUs, 4 GB RAM). Only the Exchange (B4m), the management (B2ms) and the RDS server (B2ms) differ from this. This looks pretty small for Server 2019, but it is working pretty nice.
After deploying the VMs, we assigned static IP addresses to them. To our suprise most things in Azure are lacking proper IPv6 support. :( That hurt a lot.
For most VMs we used Standard HDDs instead of SSDs. Even for your file server, because the bottleneck is not the disk, it is the connection between clients and server. Beside this, we used managed disks for all VMs, and we deployed a second disk for data if necessary (Exchange, domain Controller, file server etc.).
If a server had a DNAT in our on-prem network, we deployed a public IP, and secured the access to it.
All VMs are connected to the same Network Security Group (NSG), which we use to get control over what a VM can reach, and who can access a VM.
Patrick Terlisten/ vcloudnine.de/ Creative Commons CC0
Server Migration
Over a couple of days we moved more and more services to Azure, starting with our Domain Controllers, PKI and file services. These were low hanging fruits. The file server was easy because we already had a DFS namespace in place, so all we had to do were to change the DFS Links and point them to the new file server. The data was copied by using DFS replication.
DHCP was moved to our on-prem firewall. A printserver was not necessary any more. Windows Updates were switched back to download from Microsoft and Delivery Optimization.
The applications that were running on our Linux and Windows application server were also easy to migrate. After a couple of days we had our server workload running on Azure.
To get our ERP running, we deployed a single RDS host (quick deployment), and deployed our ERP as a remote app. It was too slow to use it over the VPN. Unfortunately the application lacks a proper database backend. :/ But as a remote app, it is working pretty good.
A bigger challenge was Exchange, but not because of the mailbox migrations.
Exchange Online
The migration to Exchange Online was pretty simple. Since our first HCW run, we used the central mail transport, so that all mails are received and sent by our on-prem mail gateway.
The mailbox migration was pretty easy and we had zero issues. Then we tried to switch the mail transport from central of Exchange Online. This was flawless too… except the fact, that our ticket system was unable to send e-mails.
Our ticket system relays its mail over our Exchange server. After switching the mail server in our ticket system to the new Azure based VM, the mails stuck in the outbound queue, even if the server tried to send the mail to our on-prem mail gateway. This quote from Microsoft explains the whole problem:
Starting on November 15, 2017, outbound email messages that are sent directly to external domains (such as outlook.com and gmail.com) from a virtual machine (VM) are made available only to certain subscription types in Microsoft Azure. Outbound SMTP connections that use TCP port 25 were blocked. (Port 25 is primarily used for unauthenticated email delivery.)
This change in behavior applies only to new subscriptions and new deployments since November 15, 2017.
Source: Microsoft
This is the case for MSDN, Azure Pass, Azure in Open, Education, BizSpark, and Free Trial subscriptions!
If you created an MSDN, Azure Pass, Azure in Open, Education, BizSpark, Azure Sponsorship, Azure Student, Free Trial, or any Visual Studio subscription after November 15, 2017, you’ll have technical restrictions that block email that’s sent from VMs within these subscriptions directly to email providers. The restrictions are done to prevent abuse. No requests to remove this restriction will be granted.
If you’re using these subscription types, you’re encouraged to use SMTP relay services, as outlined earlier in this article or change your subscription type.
Source: Microsoft
We accelerated our migration and disabled the central mail transport earlier than planned. Then we configured our Linux application server to authenticate against Exchange Online using SMTP Auth and SMTP Submission (587/tcp). For incoming mails, the mails are routed to the application server using a Exchange Online connector and a transport rule which matches to specific mail addresses.
The Azure based Exchange VM is only needed because we still have an Azure AD Connect running. Microsoft has planned to replace this by a new solution. And until this, we will run this Exchange 2016 in Azure. But it is not part of our mail flow.
Moving Azure AD Connect & decommissioning ADFS
Because we had to get rid of the ADFS server and ADFS Proxy, we deployed Pass-Through Authentication and Seamless SSO. Then we decommissioned the ADFS setup.
Moving Azure AD Connect was a bit quirky. We had conditional access already in place and the Azure AD Connect setup was unable to handle this. The synchronisation account was unable to sync, because it ran into a MFA request. We optimized our policies and got this sorted out.
Decommissioning old stuff
Whenever we moved a service successful to Azure, we switched off the on-prem server, and modified our documentation to reflect the made changes. At the end, we were able to switch off three of our four ESXi hosts. A last ESXi Host is still running for our Horizon View deployment and our firewall.
Next steps
The next post will cover how we automated this, how we do backups and whatever you’re interested in. Leave a comment! :)